在本教程中,我们将构建一个只允许特定用户访问的聊天机器人。我们将从 LangGraph 模板开始,逐步添加基于令牌的安全功能。最后,您将拥有一个正常工作的聊天机器人,它会在允许访问之前检查有效的令牌。 这是我们身份验证系列的第一部分:
- 设置自定义身份验证(您在此处)- 控制谁可以访问您的机器人
- 使对话私密 - 让用户拥有私密对话
- 连接身份验证提供商 - 添加真实用户帐户并使用 OAuth2 进行生产验证
本指南假设您对以下概念有基本了解
自定义身份验证仅适用于 LangSmith SaaS 部署或企业自托管部署。
1. 创建您的应用
使用 LangGraph 入门模板创建新的聊天机器人
pip install -U "langgraph-cli[inmem]"
langgraph new --template=new-langgraph-project-python custom-auth
cd custom-auth
pip install -e .
langgraph dev
> - 🚀 API: http://127.0.0.1:2024
> - 🎨 Studio UI: https://smith.langchain.com/studio/?baseUrl=http://127.0.0.1:2024
> - 📚 API Docs: http://127.0.0.1:2024/docs
>
> This in-memory server is designed for development and testing.
> For production use, please use LangSmith.

2. 添加身份验证
现在您有了一个基本的 LangGraph 应用,为其添加身份验证。
在本教程中,您将首先使用硬编码令牌作为示例。您将在第三个教程中实现“生产就绪”的身份验证方案。
Auth 对象允许您注册一个身份验证函数,LangSmith 部署将在每个请求上运行该函数。此函数接收每个请求并决定是接受还是拒绝。 创建一个新文件 src/security/auth.py。您的代码将在此处检查用户是否被允许访问您的机器人:from langgraph_sdk import Auth
# This is our toy user database. Do not do this in production
VALID_TOKENS = {
"user1-token": {"id": "user1", "name": "Alice"},
"user2-token": {"id": "user2", "name": "Bob"},
}
# The "Auth" object is a container that LangGraph will use to mark our authentication function
auth = Auth()
# The `authenticate` decorator tells LangGraph to call this function as middleware
# for every request. This will determine whether the request is allowed or not
@auth.authenticate
async def get_current_user(authorization: str | None) -> Auth.types.MinimalUserDict:
"""Check if the user's token is valid."""
assert authorization
scheme, token = authorization.split()
assert scheme.lower() == "bearer"
# Check if token is valid
if token not in VALID_TOKENS:
raise Auth.exceptions.HTTPException(status_code=401, detail="Invalid token")
# Return user info if valid
user_data = VALID_TOKENS[token]
return {
"identity": user_data["id"],
}
- 检查请求的 Authorization 标头中是否提供了有效令牌
- 返回用户的 身份
现在,通过将以下内容添加到 langgraph.json 配置中,告诉 LangGraph 使用身份验证
{
  "dependencies": ["."],
  "graphs": {
    "agent": "./src/agent/graph.py:graph"
  },
  "env": ".env",
  "auth": {
    "path": "src/security/auth.py:auth"
  }
}
3. 测试您的机器人
再次启动服务器以测试所有功能
langgraph dev --no-browser
--no-browser,Studio UI 将在浏览器中打开。默认情况下,即使在使用自定义身份验证时,我们也允许从 Studio 访问。这使得在 Studio 中开发和测试机器人变得更容易。您可以通过在身份验证配置中设置 disable_studio_auth: "true" 来删除此替代身份验证选项
{
    "auth": {
        "path": "src/security/auth.py:auth",
        "disable_studio_auth": "true"
    }
}
4. 与您的机器人聊天
现在,您应该只能在请求头中提供有效令牌的情况下访问机器人。但是,用户仍然可以访问彼此的资源,直到您在教程的下一部分中添加资源授权处理程序。 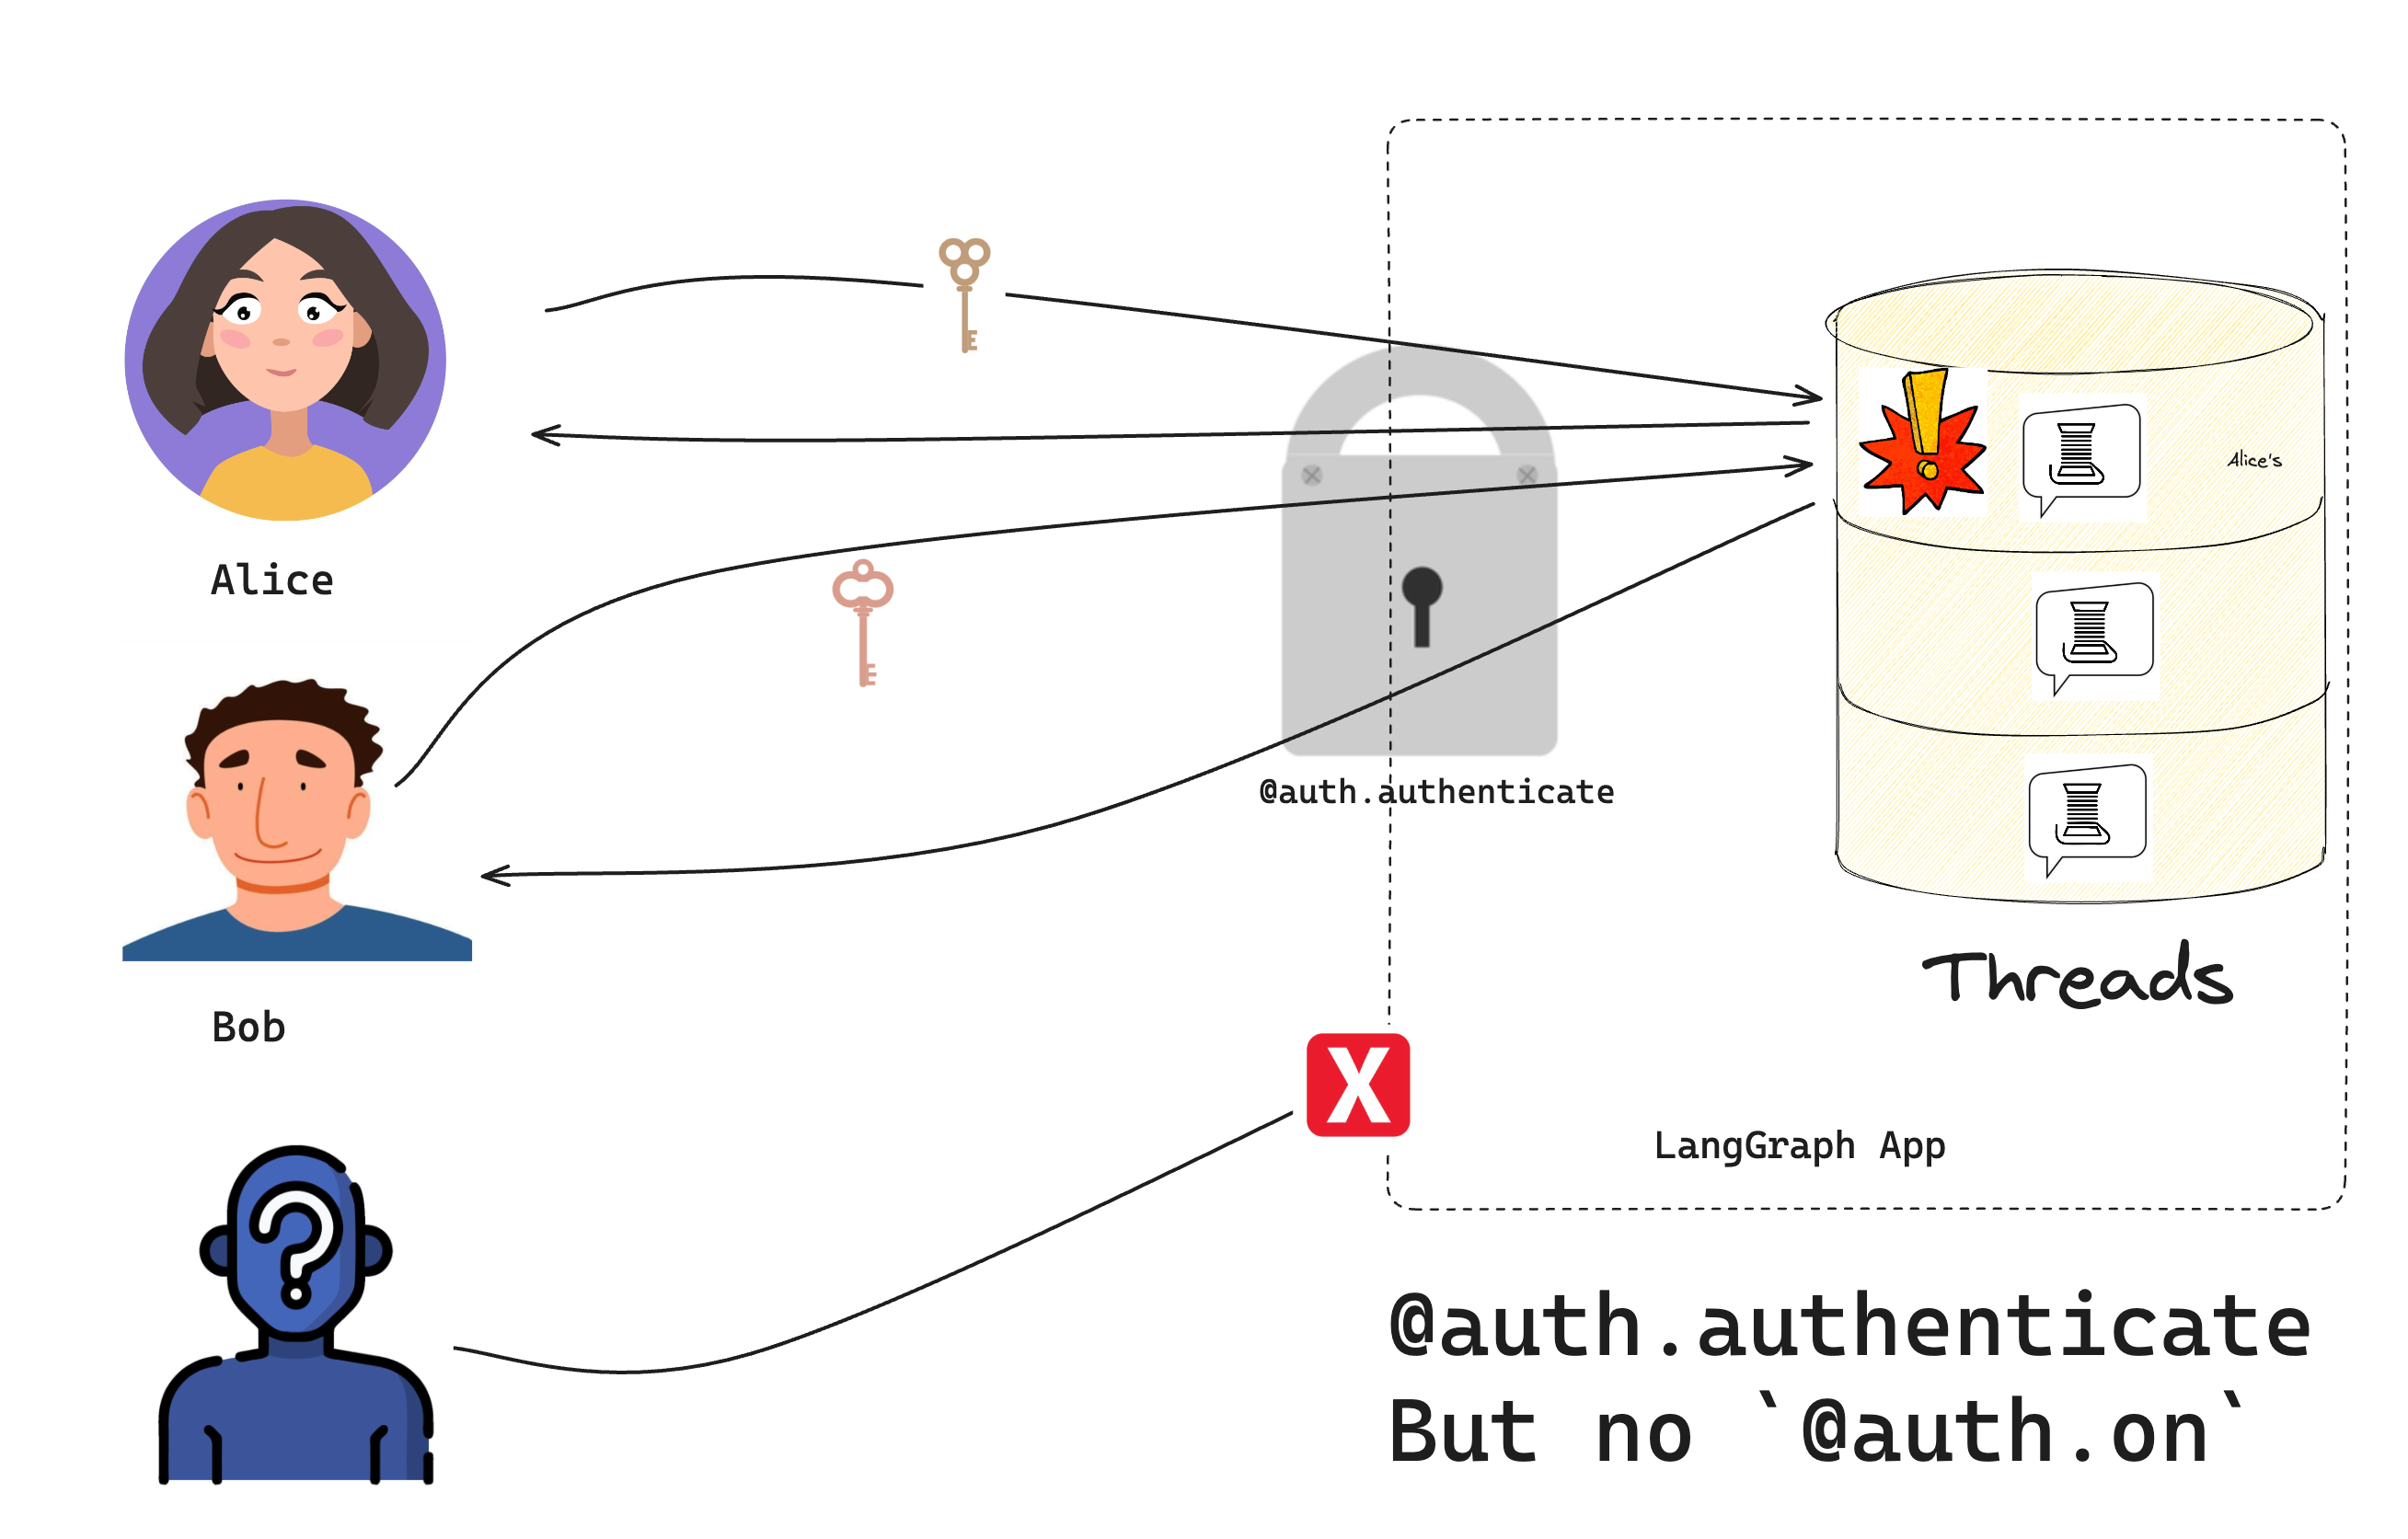 在文件或笔记本中运行以下代码:
from langgraph_sdk import get_client

# Try without a token (should fail)
client = get_client(url="https://:2024")
try:
    thread = await client.threads.create()
    print("❌ Should have failed without token!")
except Exception as e:
    print("✅ Correctly blocked access:", e)

# Try with a valid token
client = get_client(
    url="https://:2024", headers={"Authorization": "Bearer user1-token"}
)

# Create a thread and chat
thread = await client.threads.create()
print(f"✅ Created thread as Alice: {thread['thread_id']}")

response = await client.runs.create(
    thread_id=thread["thread_id"],
    assistant_id="agent",
    input={"messages": [{"role": "user", "content": "Hello!"}]},
)
print("✅ Bot responded:")
print(response)
- 没有有效令牌,我们无法访问机器人
- 有了有效令牌,我们可以创建线程并聊天
恭喜!您已经构建了一个只允许“已认证”用户访问的聊天机器人。尽管该系统尚未实现生产就绪的安全方案,但我们已经学习了如何控制机器人访问的基本机制。在下一个教程中,我们将学习如何为每个用户提供自己的私密对话。
后续步骤
现在您可以控制谁访问您的机器人了,您可能想要
- 继续本教程,前往使对话私密以了解资源授权。
- 阅读更多关于身份验证概念的内容。
- 查看API 参考以获取更多身份验证详情。

