

- 增强功能:为您的 AutoGen 代理添加持久化、流式传输、短期和长期内存等。
- 多代理系统:构建多代理系统,其中单个代理使用不同的框架构建。
- 生产部署:将您的集成解决方案部署到LangSmith,以实现可扩展的生产使用。
先决条件
- Python 3.9+
- Autogen:
pip install autogen - LangGraph:
pip install langgraph - OpenAI API 密钥
设置
设置您的环境复制
向 AI 提问
import getpass
import os


def _set_env(var: str):
    if not os.environ.get(var):
        os.environ[var] = getpass.getpass(f"{var}: ")


_set_env("OPENAI_API_KEY")
1. 定义 AutoGen 代理
创建一个可以执行代码的 AutoGen 代理。此示例改编自 AutoGen 的官方教程复制
向 AI 提问
import autogen
import os

config_list = [{"model": "gpt-4o", "api_key": os.environ["OPENAI_API_KEY"]}]

llm_config = {
    "timeout": 600,
    "cache_seed": 42,
    "config_list": config_list,
    "temperature": 0,
}

autogen_agent = autogen.AssistantAgent(
    name="assistant",
    llm_config=llm_config,
)

user_proxy = autogen.UserProxyAgent(
    name="user_proxy",
    human_input_mode="NEVER",
    max_consecutive_auto_reply=10,
    is_termination_msg=lambda x: x.get("content", "").rstrip().endswith("TERMINATE"),
    code_execution_config={
        "work_dir": "web",
        "use_docker": False,
    },  # Please set use_docker=True if docker is available to run the generated code. Using docker is safer than running the generated code directly.
    llm_config=llm_config,
    system_message="Reply TERMINATE if the task has been solved at full satisfaction. Otherwise, reply CONTINUE, or the reason why the task is not solved yet.",
)
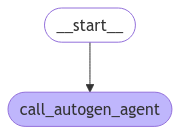
2. 创建图
我们现在将创建一个调用 AutoGen 代理的 LangGraph 聊天机器人图。复制
向 AI 提问
from langchain_core.messages import convert_to_openai_messages
from langgraph.graph import StateGraph, MessagesState, START
from langgraph.checkpoint.memory import MemorySaver

def call_autogen_agent(state: MessagesState):
    # Convert LangGraph messages to OpenAI format for AutoGen
    messages = convert_to_openai_messages(state["messages"])

    # Get the last user message
    last_message = messages[-1]

    # Pass previous message history as context (excluding the last message)
    carryover = messages[:-1] if len(messages) > 1 else []

    # Initiate chat with AutoGen
    response = user_proxy.initiate_chat(
        autogen_agent,
        message=last_message,
        carryover=carryover
    )

    # Extract the final response from the agent
    final_content = response.chat_history[-1]["content"]

    # Return the response in LangGraph format
    return {"messages": {"role": "assistant", "content": final_content}}

# Create the graph with memory for persistence
checkpointer = MemorySaver()

# Build the graph
builder = StateGraph(MessagesState)
builder.add_node("autogen", call_autogen_agent)
builder.add_edge(START, "autogen")

# Compile with checkpointer for persistence
graph = builder.compile(checkpointer=checkpointer)
复制
向 AI 提问
from IPython.display import display, Image

display(Image(graph.get_graph().draw_mermaid_png()))
3. 在本地测试图
在部署到 LangSmith 之前,您可以在本地测试该图复制
向 AI 提问
# pass the thread ID to persist agent outputs for future interactions
config = {"configurable": {"thread_id": "1"}}

for chunk in graph.stream(
    {
        "messages": [
            {
                "role": "user",
                "content": "Find numbers between 10 and 30 in fibonacci sequence",
            }
        ]
    },
    config,
):
    print(chunk)
复制
向 AI 提问
user_proxy (to assistant):

Find numbers between 10 and 30 in fibonacci sequence

--------------------------------------------------------------------------------
assistant (to user_proxy):

To find numbers between 10 and 30 in the Fibonacci sequence, we can generate the Fibonacci sequence and check which numbers fall within this range. Here's a plan:

1. Generate Fibonacci numbers starting from 0.
2. Continue generating until the numbers exceed 30.
3. Collect and print the numbers that are between 10 and 30.

...
复制
向 AI 提问
for chunk in graph.stream(
    {
        "messages": [
            {
                "role": "user",
                "content": "Multiply the last number by 3",
            }
        ]
    },
    config,
):
    print(chunk)
复制
向 AI 提问
user_proxy (to assistant):

Multiply the last number by 3
Context:
Find numbers between 10 and 30 in fibonacci sequence
The Fibonacci numbers between 10 and 30 are 13 and 21.

These numbers are part of the Fibonacci sequence, which is generated by adding the two preceding numbers to get the next number, starting from 0 and 1.

The sequence goes: 0, 1, 1, 2, 3, 5, 8, 13, 21, 34, ...

As you can see, 13 and 21 are the only numbers in this sequence that fall between 10 and 30.

TERMINATE

--------------------------------------------------------------------------------
assistant (to user_proxy):

The last number in the Fibonacci sequence between 10 and 30 is 21. Multiplying 21 by 3 gives:

21 * 3 = 63

TERMINATE

--------------------------------------------------------------------------------
{'call_autogen_agent': {'messages': {'role': 'assistant', 'content': 'The last number in the Fibonacci sequence between 10 and 30 is 21. Multiplying 21 by 3 gives:\n\n21 * 3 = 63\n\nTERMINATE'}}}
4. 准备部署
要部署到 LangSmith,请创建如下文件结构复制
向 AI 提问
my-autogen-agent/
├── agent.py          # Your main agent code
├── requirements.txt  # Python dependencies
└── langgraph.json   # LangGraph configuration
- agent.py
- requirements.txt
- langgraph.json
复制
向 AI 提问
import os
import autogen
from langchain_core.messages import convert_to_openai_messages
from langgraph.graph import StateGraph, MessagesState, START
from langgraph.checkpoint.memory import MemorySaver

# AutoGen configuration
config_list = [{"model": "gpt-4o", "api_key": os.environ["OPENAI_API_KEY"]}]

llm_config = {
    "timeout": 600,
    "cache_seed": 42,
    "config_list": config_list,
    "temperature": 0,
}

# Create AutoGen agents
autogen_agent = autogen.AssistantAgent(
    name="assistant",
    llm_config=llm_config,
)

user_proxy = autogen.UserProxyAgent(
    name="user_proxy",
    human_input_mode="NEVER",
    max_consecutive_auto_reply=10,
    is_termination_msg=lambda x: x.get("content", "").rstrip().endswith("TERMINATE"),
    code_execution_config={
        "work_dir": "/tmp/autogen_work",
        "use_docker": False,
    },
    llm_config=llm_config,
    system_message="Reply TERMINATE if the task has been solved at full satisfaction.",
)

def call_autogen_agent(state: MessagesState):
    """Node function that calls the AutoGen agent"""
    messages = convert_to_openai_messages(state["messages"])
    last_message = messages[-1]
    carryover = messages[:-1] if len(messages) > 1 else []

    response = user_proxy.initiate_chat(
        autogen_agent,
        message=last_message,
        carryover=carryover
    )

    final_content = response.chat_history[-1]["content"]
    return {"messages": {"role": "assistant", "content": final_content}}

# Create and compile the graph
def create_graph():
    checkpointer = MemorySaver()
    builder = StateGraph(MessagesState)
    builder.add_node("autogen", call_autogen_agent)
    builder.add_edge(START, "autogen")
    return builder.compile(checkpointer=checkpointer)

# Export the graph for LangSmith
graph = create_graph()
5. 部署到 LangSmith
使用 LangSmith CLI 部署图复制
向 AI 提问
pip install -U langgraph-cli
复制
向 AI 提问
langgraph deploy --config langgraph.json
以编程方式连接这些文档到 Claude、VSCode 等,通过 MCP 获取实时答案。